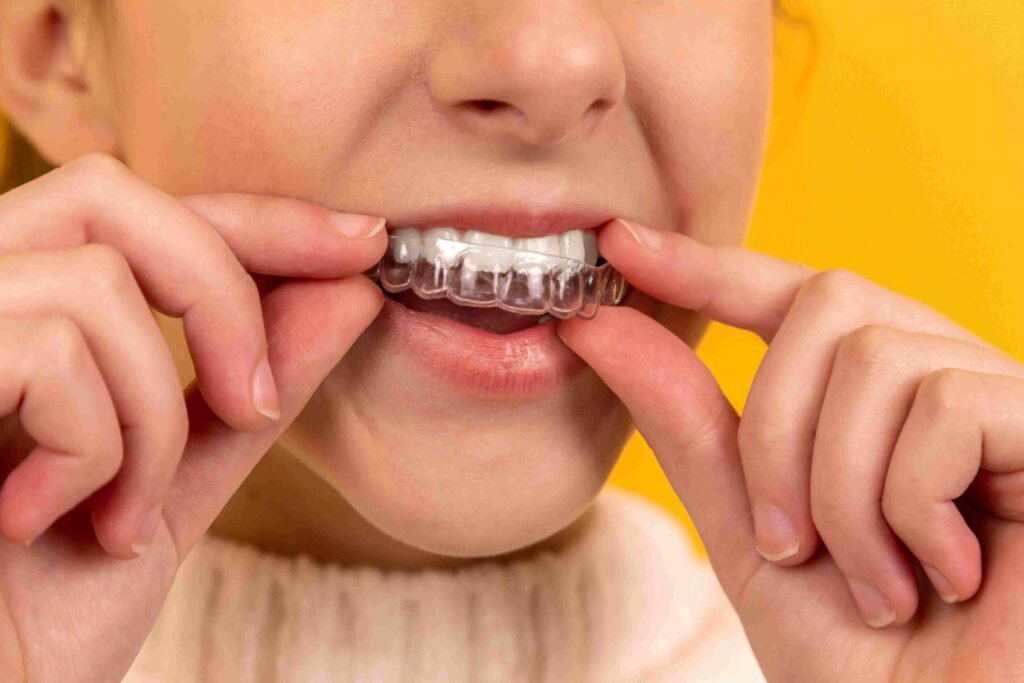
Let me tell you something embarrassing – for months, I struggled with retainers that smelled like I’d been chewing on a gym sock! Despite religiously soaking them in those expensive cleaning tablets, that funky odor just wouldn’t quit. It wasn’t until my dental hygienist casually mentioned using baking soda that my retainer-cleaning game completely changed. After trying literally everything on the market, I was skeptical that something as simple as baking soda could work better than commercial cleaners. But boy, was I wrong! The journey to discover how to clean plastic retainer with baking soda and other natural methods revolutionized my oral care routine and saved me a ton of money. If you’re tired of fighting retainer funk and chemical cleaners that don’t deliver, stick around – I’m sharing every odor-fighting trick I’ve discovered after years of retainer wear.
Why Your Retainer Gets Gross (Even When You Think You’re Cleaning It Right)
I used to brush my retainer every night and still ended up with a cloudy, smelly piece of plastic by week’s end. It was frustrating! What I didn’t realize was that retainers are basically magnets for bacteria, plaque, and minerals from your saliva. These microscopic troublemakers love to party in the tiny crevices of your retainer.
The biggest culprits behind retainer funk are actually things that most cleaning methods don’t address. First, there’s biofilm – that slimy bacterial layer that forms regardless of how often you rinse. Then there’s mineral buildup (similar to limescale in your bathroom) that gradually forms a crusty white layer. And don’t get me started on the tiny food particles that somehow find their way into every groove!
My dentist explained that commercial cleaners often just mask odors without actually removing the source. This was a total lightbulb moment for me! I’d been spending money on products that were essentially perfuming my bacteria rather than eliminating it.
The real kicker is that many retainers have microscopic pores where bacteria hide. You can’t see these hiding spots, but your nose sure can detect them! After wearing my retainer overnight, these bacterial colonies would multiply like crazy, leading to that morning retainer stench we all dread.
Temperature matters too – I made the mistake of cleaning my retainer with hot water once, which warped it slightly. That created even more places for gunk to accumulate! No wonder my attempts at cleaning weren’t working – I was making rookie mistakes that were actually making the problem worse.
The Baking Soda Method That Changed Everything
Let me tell you about the day I discovered the baking soda miracle. After yet another frustrating morning of removing my retainer and nearly gagging at the smell, I decided to try what my hygienist had suggested. I was skeptical, but desperate times called for desperate measures!
Here’s the exact method that worked for me:
First, I grabbed a clean cup and mixed 2 tablespoons of baking soda with warm (not hot!) water until it formed a paste-like consistency. I made sure the water wasn’t too hot – learned that lesson the hard way with a $500 replacement retainer! Then I took an old toothbrush (designated just for my retainer) and gently scrubbed the paste all over my plastic retainer, paying special attention to those grooves where my teeth sit.
The first time I did this, I was shocked at how much gunk came off! There was this weird yellowish tinge that I’d honestly thought was just part of the retainer material. Nope – that was all buildup! I spent about a minute really working the paste into all the nooks and crannies.
After scrubbing, I rinsed it thoroughly with cool water. This step is super important – you don’t want baking soda residue left behind, trust me. That stuff tastes terrible! The first thing I noticed was how squeaky clean the retainer felt between my fingers – that sliminess was completely gone.
For extra cleaning power, especially if your retainer is seriously funky, you can soak it in a baking soda solution. I mix 3 tablespoons of baking soda in a cup of water and let my retainer take a bath for about 15-20 minutes. Any longer and the acid in the solution might affect the plastic – something my orthodontist warned me about!
The results? My retainer was odor-free for the first time in forever! No more morning breath emanating from my retainer case. The plastic looked clearer too – not perfectly transparent like new, but definitely an improvement from the cloudy mess it had become.
I now do this baking soda cleaning twice a week as maintenance, and it’s kept my retainer fresh for over a year now. The best part? A box of baking soda costs a couple bucks and lasts for months, compared to those $15 cleaning tablet packs I used to buy every few weeks.
Beyond Baking Soda: My Other Natural Cleaning Discoveries
While baking soda became my go-to cleaning method, I’ve experimented with several other natural approaches that work surprisingly well. Some became part of my regular rotation, while others I reserve for deep cleaning sessions.
The vinegar soak was a game-changer for tackling mineral buildup. White vinegar’s acidity breaks down those stubborn calcium deposits that make retainers look cloudy. I mix equal parts white vinegar and warm water, then soak my retainer for no more than 15 minutes (any longer and it could damage the plastic). The first time I tried this, I was astonished at the tiny bubbles forming around the calcium deposits – it was literally dissolving away years of buildup! Just be prepared for the smell, and don’t skip rinsing thoroughly afterward unless you enjoy tasting salad dressing all day.
Hydrogen peroxide is another kitchen staple that became part of my arsenal. I discovered this one by accident when I ran out of cleaning tablets and remembered my mom using it to disinfect cuts when I was a kid. The standard 3% solution from any drugstore works perfectly. I dilute it with equal parts water and soak for 30 minutes. The bubbling action physically lifts bacteria from those microscopic pores. I noticed my retainer not only looked cleaner but stayed odor-free longer after using hydrogen peroxide.
For daily maintenance, I started using castile soap – the gentle, plant-based kind. Just a tiny drop on my retainer brush creates enough foam to clean without any harsh chemicals. I was skeptical about using “soap” on something that goes in my mouth, but pure castile soap rinses clean without residue, and doesn’t leave any taste behind. This has become my everyday cleaner, with baking soda sessions twice weekly.
The strangest method I tried (that actually worked) was denture cleaning tablets made with citric acid rather than harsh chemicals. I broke one tablet in half, dissolved it in cool water, and soaked my retainer while showering. The fizzing action combined with the natural citric acid lifted stains I thought were permanent! These tablets are pricier than my other methods, so I save them for occasional use when my retainer needs extra freshening.
Each of these methods has its place in my cleaning rotation, but I’ve found that alternating between them works better than sticking to just one. The different cleaning mechanisms target various types of buildup, keeping my retainer cleaner than any single method could alone.
My Daily Retainer Cleaning Routine That Prevents Buildup
After years of trial and error, I’ve finally nailed down a daily routine that keeps my retainer clean without taking forever or breaking the bank. Consistency is the real secret here – a little maintenance every day prevents those marathon cleaning sessions later.
First thing in the morning, as soon as I take my retainer out, I rinse it under cool running water. This seems so obvious, but I used to just toss it in its case, allowing all that overnight saliva to dry and harden (gross, I know). Just 10 seconds of rinsing washes away a surprising amount of buildup before it can set.
Next comes a quick gentle brushing with a soft toothbrush – not the same one I use for my teeth! I learned this the hard way after transferring toothpaste residue to my retainer, which created a weird film. I keep a separate retainer brush by the sink and give my retainer a quick once-over, focusing on the inner surfaces where my teeth sit. I don’t use any cleaner for this morning brush, just water.
Throughout the day while my retainer’s in its case, I make sure it stays dry. This was a major revelation – a damp retainer case is basically a bacteria greenhouse! I used to line my case with a damp paper towel thinking the moisture would prevent my retainer from drying out. Instead, I was creating the perfect environment for odor-causing bacteria. Now I make sure both the retainer and case are completely dry before closing it up.
Before bedtime is when my detailed cleaning happens. I alternate between my natural methods: baking soda paste on Mondays and Thursdays, vinegar soak on Tuesdays, hydrogen peroxide bath on Saturdays, and plain castile soap the other days. This rotation tackles different types of buildup and prevents any single method from potentially damaging the plastic over time.
The final step that made a huge difference was cleaning the retainer case itself. This was my blind spot for years – I’d meticulously clean my retainer then put it back in a germy case! Now I wash the case with dish soap and hot water every other day, letting it air dry completely before putting my retainer back. For weekly disinfection, I wipe it down with a cotton ball soaked in rubbing alcohol.
This routine sounds elaborate written out, but it actually takes just a few minutes each day. The payoff has been huge – my retainer stays clear and odor-free, and my dentist has commented on how well-maintained it is. The best compliment? When my husband stopped commenting about my “stinky mouth guard” in the bathroom!
Retainer Don’ts: Mistakes That Damaged Mine
Look, I’ve made every retainer-cleaning mistake in the book, and some of them cost me dearly. Let me save you from my expensive errors!
My costliest mistake was using hot water to clean my retainer. One summer afternoon, I decided that hotter water would sanitize better, so I ran my retainer under the hot tap. That momentary decision cost me $450 for a replacement after my retainer warped just enough that it no longer fit properly. Plastic retainers are incredibly temperature-sensitive – even warm water can potentially warp them. Always stick to cool or room temperature water!
Toothpaste was another unexpected enemy. I logically assumed that what cleans teeth would clean retainers, right? Wrong! Many toothpastes contain abrasive particles that scratched my retainer’s surface, creating tiny grooves where bacteria could hide. Those microscopic scratches turned my clear retainer cloudy over time and made it harder to get truly clean. I’ve since learned that anything abrasive – including baking soda if used too vigorously – can damage the plastic surface.
Alcohol-based mouthwash soaks were another disaster. After reading online that mouthwash could disinfect retainers, I soaked mine overnight in the strong mint variety. By morning, the plastic had developed tiny cracks and actually absorbed the blue color from the mouthwash! My orthodontist explained that the alcohol had broken down the plastic material. I not only had a compromised retainer but also one that leached mouthwash flavor into my mouth for weeks afterward.
Perhaps my most embarrassing mistake was forgetting my retainer on a napkin at a restaurant. I removed it discreetly before eating and wrapped it in a napkin – which the server promptly cleared away. By the time I realized what had happened, my retainer was lost in a garbage bin somewhere. Now I always bring my retainer case when dining out!
Leaving my retainer in a hot car taught me another expensive lesson. During a summer road trip, I left my retainer case on the dashboard while stopping for lunch. When I returned, the case had partially melted and the retainer inside was completely deformed. Now I’m paranoid about temperature and never leave my retainer anywhere that might get hot.
Bleach was perhaps my most damaging cleaning attempt. After reading that diluted bleach would kill all bacteria, I made a weak solution and soaked my retainer for “just a few minutes.” The retainer came out noticeably whiter – because the bleach had begun breaking down the plastic material! It became brittle and eventually snapped a few weeks later. No amount of disinfection is worth destroying your retainer!
Learn from my mistakes – stick to gentle, natural cleaning methods, always use protective cases, and never expose your retainer to heat or harsh chemicals. Your wallet will thank you!
When to Replace Your Retainer (Despite Your Best Cleaning Efforts)
Even with perfect cleaning habits, retainers don’t last forever. I learned this the hard way after trying to extend my retainer’s life well past its prime. There are some clear signs that no amount of cleaning will help and it’s time for a replacement.
The most obvious indicator is cracks or breaks. My first retainer developed a hairline crack that I barely noticed – until it suddenly split completely while I was wearing it! Any crack compromises the structure and can harbor bacteria in impossible-to-clean crevices. When I ran my fingernail along the edge and it caught on a rough spot, that should have been my signal to replace it immediately.
Severe discoloration that doesn’t improve with cleaning is another sign your retainer has reached the end. After about two years, my retainer had a yellowish tinge that no amount of soaking or scrubbing would remove. My dentist explained that this happens when the plastic itself degrades and absorbs stains into its matrix. Once the discoloration is in the material rather than on the surface, no cleaning method will help.
Persistent bad odor despite thorough cleaning was my most convincing reason to replace. When my properly cleaned retainer still smelled funky after just a few hours of wear, the plastic had clearly become permanently permeated with bacteria. This isn’t just a cosmetic issue – it means you’re putting something in your mouth that can’t be properly sanitized anymore.
Changes in fit were subtle but important signals. As retainers age, they can slightly change shape from the pressure of wear and cleaning. I noticed my teeth felt slightly different in the mornings, and my orthodontist confirmed that my retainer was no longer providing the proper alignment. This was the hardest to accept since the retainer didn’t look obviously damaged, but it was no longer doing its job.
My orthodontist gave me a general guideline: with proper care, plastic retainers typically last 1-2 years before needing replacement. Some people stretch this to 3-5 years, but that’s really pushing it. I’ve found that budgeting for a replacement every two years saves me from the surprise cost and the worry about whether my retainer is still effective.
When I finally accepted these signs and stopped trying to resurrect an aging retainer, my oral health improved and those persistent retainer odors disappeared. Sometimes the best cleaning solution is simply a new retainer!
Conclusion: A Fresh Approach to Retainer Care
After years of fighting with funky retainers and wasting money on cleaning products that didn’t work, discovering how to clean plastic retainer with baking soda and other natural methods has been revolutionary for my daily routine. These simple, inexpensive solutions actually work better than many commercial products I’ve tried, and they’ve kept my retainer looking clearer and smelling fresher than ever before.
The baking soda method has become my reliable standby, but rotating between different natural cleaners has proven most effective for tackling all types of buildup. Whether it’s the vinegar for mineral deposits, hydrogen peroxide for deep disinfection, or gentle daily cleaning with castile soap, these methods have transformed my retainer experience.
What surprised me most was how much of a difference consistent, proper cleaning makes. No more embarrassing moments of removing my retainer only to catch a whiff of that unmistakable funk. No more cloudy plastic that makes me want to hide my retainer. Just a clean, clear appliance that does its job without becoming a science experiment in my mouth!
If you’re struggling with retainer cleanliness, I encourage you to try these natural methods before spending money on expensive cleaning systems or, worse, replacing your retainer prematurely. Start with the baking soda paste today – you probably already have everything you need in your kitchen!
Remember that even the best cleaning routine can’t make a retainer last forever. Be aware of the signs that it’s time for replacement, and don’t try to extend the life of a retainer that’s structurally compromised.
I’d love to hear about your experiences with natural retainer cleaning methods! Have you tried the baking soda technique? Did you discover any other household solutions that worked well? Share your successes and even your disasters in the comments – we can all learn from each other’s retainer adventures!
Comments