My Braces Journey Started with Bleeding Gums (Until I Discovered This Flossing Method)
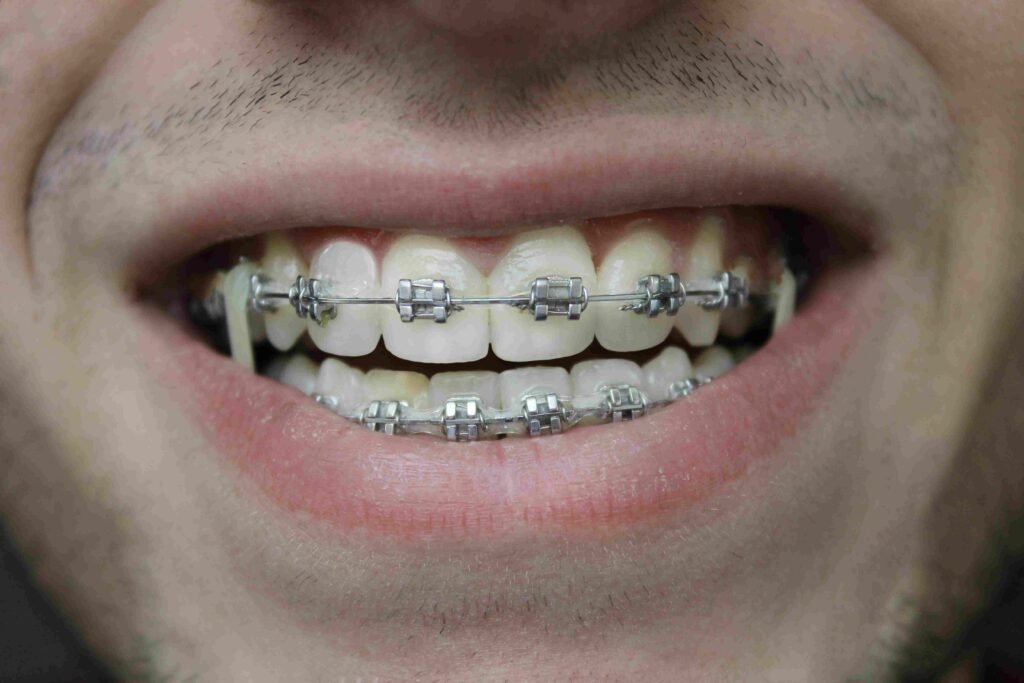
Let me tell you, getting braces at 32 was not on my bucket list. But after years of hiding my smile in photos, I finally bit the bullet. What my orthodontist failed to mention was how those tiny metal brackets would transform my simple two-minute flossing routine into what felt like an Olympic sport.
Three weeks after getting my braces installed (yes, “installed” is how it felt), my gums were so swollen and bloody that brushing became a horror show. My regular dental hygienist actually gasped during my check-up. Not exactly the reaction you want from a professional!
“Your plaque levels are concerning,” she said with that disappointed tone that made me feel like I was 12 again. “Are you flossing daily?”
I wasn’t. Because I couldn’t figure out how to navigate that minefield of metal in my mouth without spending 20 frustrating minutes and ending up with shredded floss and bleeding gums.
That appointment was my wake-up call. I spent the next month experimenting with every flossing method for braces I could find. What I’m sharing today quite literally saved my gums—and possibly prevented a few cavities along the way. If I had known these techniques from day one, I would’ve saved myself so much pain (and embarrassment at dental appointments!).
Traditional Flossing with Braces: The Method That Finally Clicked for Me
Regular floss might seem impossible with braces, but with the right technique, it’s actually my preferred method. Here’s exactly what worked for me after weeks of trial and error:
What You’ll Need:
- Waxed floss (unwaxed kept shredding on my brackets)
- Floss threader (those little plastic needle-looking things)
- A mirror (trust me, you need to see what’s happening)
- About 10 minutes of patience (at least until you get faster)
- Optional: Those little interdental brushes for touch-ups
Step 1: Cut a Generous Length of Floss
I learned this the hard way—cut about 18-24 inches of floss. My first attempts with shorter pieces left me fumbling and starting over repeatedly. With braces, you need enough floss to grip comfortably while navigating around wires.
Step 2: Thread the Floss Through the Threader
Think of the floss threader as a needle, and the floss as your thread. Loop about 2 inches of your floss through the eye of the threader. I pinch the threader and floss together between my thumb and index finger to keep it secure.
Step 3: Insert the Threader Under the Main Wire
This is where I kept messing up at first. You want to insert the pointed end of the threader under the archwire (that’s the main wire connecting all your brackets). Push it through from the front until you see it poke through behind the wire.
I found it helps to start at the back of your mouth and work forward. Don’t ask me why, but it’s less awkward that way.
Step 4: Pull the Threader Through, Bringing the Floss with It
Once the threader is poking through behind the wire, grab it and pull it all the way through. The floss will follow, positioning itself between the wire and your gums. The first time I successfully did this for all my teeth, I felt unreasonably proud of myself!
Step 5: Now Floss Normally Between Two Teeth
With the floss positioned under the wire, you can now floss between two teeth just like you normally would (pre-braces). Wrap the floss in a C-shape around each tooth and gently move it up and down. Don’t snap it against your gums like I did the first week—ouch!
Step 6: Remove and Repeat for Each Tooth
After flossing between those two teeth, carefully pull the floss out from under the wire and repeat the whole process for the next gap between teeth.
Yeah, it’s time-consuming. My first full mouth flossing session took nearly 25 minutes. But after two weeks of daily practice, I got it down to about 8 minutes.
Floss Picks and Braces: My Weekend Hack
On those nights when I’m exhausted or traveling, I’ll admit that threading traditional floss feels like too much work. That’s when I turn to my backup method: specialized floss picks designed for braces.
What You’ll Need:
- Orthodontic floss picks (Platypus flossers saved my lazy days)
- Mirror
- About 5 minutes
Step 1: Position the Forked End of the Pick at the Gumline
The orthodontic floss picks have a thin, forked end specifically designed to slide under your archwire. Position this end at your gumline, with the floss part facing your teeth.
Step 2: Slide the Pick Under the Wire
Here’s where these picks shine—they’re pre-threaded! Just slide that forked end under your archwire until the floss is positioned between your teeth. The first time I did this, I almost cried with relief at how much easier it was.
Step 3: Gently Move the Pick Up and Down
Once positioned, gently move the pick up and down to floss between the teeth. The floss is already at the perfect angle—a miracle of modern dental technology!
Step 4: Remove and Repeat
Simply pull the pick out and move to the next gap between teeth. Repeat around your entire mouth. I’ve timed it—with these picks, I can floss my whole mouth in about 5 minutes.
The downside? They’re more expensive than regular floss, and honestly, I don’t feel like they clean quite as thoroughly. But for those nights when you’re tempted to skip flossing entirely, they’re a lifesaver.
Water Flossing: The Game-Changer in My Routine
Six months into my braces journey, my sister gifted me a water flosser for my birthday (weird gift, but it became my favorite thing ever). If you can afford one, GET IT.
What You’ll Need:
- Water flosser/oral irrigator
- Sink (trust me, it gets messy)
- Towel (see above about messiness)
- About 2 minutes
Step 1: Fill the Reservoir and Adjust the Pressure
Fill the water tank with lukewarm water. When I first started, I set the pressure to the lowest setting (my gums were sensitive after months of inadequate cleaning). As your gums get healthier, you can gradually increase the pressure.
I learned through messy experience to never test the water pressure by pressing the button while the tip is pointing upward. Unless you enjoy cleaning water off your bathroom ceiling.
Step 2: Lean Over the Sink
This step is non-negotiable unless you want a wet shirt. Lean over the sink, close your lips slightly around the tip (but not completely—you need to let the water flow out).
Step 3: Start at the Back, Work Forward
Turn on the flosser and aim the stream at the gumline, where your gums meet your teeth, focusing on the areas around brackets. I start with my back molars and work my way around to the other side.
Pause briefly (about 2 seconds) between each tooth, making sure to get both above and below the archwire. The first time I used it, I was disgusted (but also weirdly satisfied) by how much food debris came out from areas I thought I’d cleaned.
Step 4: Pay Special Attention to the Brackets
Direct the water stream around each bracket, especially underneath them where food loves to hide. This was a revelation to me—areas I couldn’t reach with traditional floss were suddenly clean!
Step 5: Finish with a Mouth Rinse
After water flossing, I like to swish with water or an alcohol-free mouthwash. It helps clear any remaining loosened particles and leaves my mouth feeling fresher than any other method.
The absolute best part? The entire process takes about 2 minutes. TWO MINUTES! Compare that to the 25 minutes I spent on my first attempt with traditional floss.
Combining Methods for Complete Cleaning: My Daily Routine
After three months of experimentation, I settled on a combination approach that my hygienist actually complimented at my next visit (a far cry from the previous gasping).
Morning Routine:
- Brush thoroughly (3 minutes with my electric toothbrush)
- Quick water floss on medium pressure
Night Routine (more thorough):
- Brush thoroughly
- Traditional floss with threader (or floss picks if I’m exhausted)
- Water floss on higher pressure to flush out anything I missed
- Interdental brush for any trouble spots around brackets
For me, this combination approach reduced my gingivitis significantly within two weeks. By month three, my gums stopped bleeding entirely during brushing and flossing.
Troubleshooting Common Flossing Issues with Braces
Throughout my braces journey, I’ve encountered just about every flossing problem imaginable. Here’s how I solved the most annoying ones:
Problem: Floss Keeps Shredding on Brackets
Solution: This was driving me crazy until I switched to waxed floss. The wax helps the floss glide over the sharp edges of brackets without catching and shredding. Also, be gentler when pulling the floss through—I was using too much force at first.
Problem: Gums Bleed Every Time I Floss
Solution: This happened to me for the first month. Counterintuitively, the solution is to floss MORE regularly, not less. Bleeding gums are inflamed gums, usually from bacteria buildup. Consistent flossing (even if it bleeds initially) will improve gum health over time. My bleeding stopped after about three weeks of daily flossing.
If bleeding persists beyond a month of daily flossing, talk to your dentist—don’t be stubborn like I was.
Problem: Can’t Reach Back Molars with Threader
Solution: This was frustrating until I started using a small dental mirror (like dentists use) to see what I was doing. Alternatively, orthodontic floss picks with longer handles work better for those hard-to-reach places.
Problem: Water Flosser Makes a Huge Mess
Solution: Learn from my bathroom flooding incidents! Start with your mouth closed around the tip before turning on the device, keep your head lowered over the sink, and only open your lips slightly to let the water drain out. It took me about a week to stop soaking myself and my bathroom.
Products That Made Flossing with Braces Bearable for Me
Throughout my braces journey, I’ve probably spent too much money testing different products. These are the ones that actually made a difference:
- Platypus Orthodontic Flossers – These pre-threaded floss picks saved me on tired nights. They’re pricier than regular floss but worth it for convenience.
- GUM Eez-Thru Floss Threaders – After trying three brands, these were the sturdiest and easiest to manipulate.
- Oral-B Super Floss – This pre-cut floss with a stiff end eliminates the need for a separate threader. The middle fuzzy part cleans wonderfully around brackets.
- Waterpik Water Flosser – If you can afford only one specialized product, make it this one. Nothing else removed as much debris from around my brackets.
- Interdental Brushes (GUM Proxabrush) – These tiny Christmas-tree-shaped brushes reach places even water flossers miss, especially right under the wire. I keep a pack in my desk drawer for post-lunch cleanups.
I won’t pretend these products are cheap, but neither are dental bills for cavities. My orthodontist warned me that cavity rates double for some people during orthodontic treatment. Three years of braces were expensive enough—I didn’t want to add fillings to that bill!
The Reality Check: How Often Should You Really Floss with Braces?
My orthodontist recommended flossing after every meal. Let’s be honest—that never happened in my real life. Here’s what actually worked for me:
Ideally: Floss once daily, thoroughly, using a combination of methods. Realistically: If you can’t do a full flossing session, at least use a water flosser or interdental brushes after meals to remove obvious food particles.
On my busiest days, I compromised with a thorough brush and water floss in the morning, interdental brushes after lunch, and a complete routine (brush, traditional floss, water floss) before bed.
What I noticed is that consistency matters more than perfection. My gum health improved dramatically when I flossed daily, even if it wasn’t the most thorough job every single time.
Conclusion: It Gets Easier, I Promise
Looking back at my first month with braces, I can’t believe how much I struggled with flossing. What once took me nearly half an hour now takes about 10 minutes for a complete routine. My gums no longer bleed, my last check-up was cavity-free, and my orthodontist commented on how well I’ve maintained my oral hygiene.
If you’re new to braces and feeling overwhelmed by flossing, please know it gets better. Your fingers become more nimble, you develop muscle memory for the techniques, and your gum health improves, making the whole process less painful.
Start with whichever method seems least intimidating. Water flossing is the easiest entry point, but try to work your way up to including traditional flossing in your routine for the most thorough cleaning.
Remember, those braces are temporary, but the habits you develop now will benefit your oral health long after they’re removed. Trust me, when you’re admiring your straight smile in the future, you’ll be glad you put in the effort to keep it healthy along the way.
What flossing techniques have worked for you with braces? I’d love to hear your tips and tricks in the comments—we’re all in this metal-mouth journey together!
Comments